The Ultimate Electrical Switch Guide: How to Change an Electrical Switch and How to Connect an Electricity Switch Safely
Published: Author: Joanna
Introduction
Electrical switches form the critical backbone of residential, commercial, and industrial power systems everywhere. They provide direct, immediate control over lighting arrays and heavy machinery on a daily basis. Without these simple yet ingenious devices, managing electrical current within a building would be impossible.
Understanding how to change an electrical switch safely ensures long-term infrastructure reliability. Mastering this skill protects maintenance personnel and homeowners from dangerous, life-threatening electrical shocks. Replacing degraded components proactively also dramatically reduces the risk of hidden electrical fires behind the drywall.
Oohmage supplies high-quality electrical switches, robust wiring accessories, and advanced electrical protection products globally. We engineer our components specifically to meet the rigorous demands of modern electrical applications. Upgrading your infrastructure with premium parts guarantees exceptional performance and uncompromising user safety.
What Does an Electrical Switch Do?
These devices exist to interrupt or complete an electrical circuit safely and securely. Flipping the toggle breaks the conductive copper path, stopping the flow of electricity instantly. Conversely, turning the device on bridges that tiny gap, allowing electrons to power connected appliances.
Various switch types exist to meet totally different lighting and power control needs perfectly. Single-pole variants control one specific light fixture from a single location easily. Double-pole designs manage heavy-duty 240-volt appliances, completely severing the power to large water heaters.
Three-way setups allow users to operate a single hallway fixture from two different locations. Smart switches integrate directly with home automation networks for seamless voice and smartphone control.
Modern Electrical Switch Solutions
Today’s manufacturers prioritize highly advanced materials alongside sophisticated, safety-focused physical designs. Polycarbonate switch housings resist severe impacts and prevent accidental internal electrical arcing effectively. Additionally, many contemporary units feature antimicrobial surfaces and screwless faceplates for a clean, highly secure finish.
Safety Precautions Before Working on an Electrical Switch
Working directly with electricity demands absolute focus and strict adherence to established safety protocols. Ignoring fundamental safety rules leads directly to severe physical injuries or catastrophic property fires.
Turn Off the Power Supply
Always begin your project by disconnecting the power at the main breaker panel. Identify the specific circuit breaker controlling your work area and flip it completely off. Industrial settings require strict lockout/tagout procedures to prevent accidental re-energization by unaware colleagues. Taking this fundamental step removes the primary electrocution hazard immediately.
Verify the Circuit Is De-Energized
Never rely solely on the physical position of a toggle to confirm your safety. Grab a reliable non-contact voltage tester or a digital multimeter to double-check the exposed wires. Touch the tester probes to the side terminals to ensure absolutely zero current flows through the box.
Use Proper Safety Equipment
Equip yourself with fully insulated hand tools designed specifically for dangerous electrical labor. Protective rubber electrician gloves add another critical layer of defense against unexpected stray currents. Ensure your working conditions remain completely dry, and set up adequate lighting to see every wire clearly.
Tools and Materials Needed
Gathering the right equipment beforehand makes the entire replacement process incredibly smooth and efficient.
Essential Electrical Tools
Keep both flathead and Phillips screwdrivers nearby to remove tight faceplates and terminal screws safely. A high-quality pair of wire strippers allows you to expose fresh copper wire cleanly. Grab needle-nose pliers to bend perfect loops at the end of each solid conductor. Finally, a non-contact voltage tester acts as your ultimate, non-negotiable safety verification device.
Replacement Electrical Switch
Ensure your new hardware perfectly matches the voltage and current ratings of the old unit. Installing a basic 15-amp device on a heavy 20-amp circuit creates a massive fire hazard. Verify that the replacement completely matches the required structural configuration, whether single-pole or three-way.
Wiring Accessories
Stock up on properly sized wire connectors to secure multiple copper conductors tightly together. High-grade electrical tape provides an excellent, insulated wrap around exposed side terminals for added security. Keep extra mounting screws on hand just in case the existing ones strip out during the removal process.
How to Change an Electrical Switch Step by Step
Replacing faulty hardware requires methodical execution to guarantee a secure, long-lasting connection. Follow this sequential guide to learn exactly how to change an electrical switch correctly.
Step 1 – Turn Off and Verify Power: Locate the main service panel and shut off the corresponding circuit breaker. Confirm absolutely zero voltage exists using your reliable non-contact tester before handling anything inside the box.
Step 2 – Remove the Existing Switch: Unscrew the outer wall plate and set the tiny painted screws aside carefully. Remove the top and bottom mounting screws holding the metal yoke tightly against the wall. Pull the old device outward gently to expose the attached wiring inside the electrical box.
Step 3 – Disconnect the Wiring: Identify the incoming line, outgoing load, and bare copper ground conductors clearly. Loosen the brass and silver terminal screws to release each conductor safely from the old hardware.
Step 4 – Install the New Switch: Connect the bare copper conductor to the green grounding screw first. Attach the line and load wires to the appropriate brass or black terminals, ensuring a tight fit.
Step 5 – Restore Power and Test Operation: Push the connected hardware back into the wall box and tighten the mounting screws. Reinstall the decorative cover plate, flip the breaker back on, and verify the fixture operates perfectly.e component to prevent lateral movement caused by ambient heavy machinery vibration.
How to Connect Electricity Switch Safely
Securing wires properly ensures long-lasting functionality and prevents dangerous electrical arcing behind your drywall. Knowing exactly how to connect electricity switch components is the absolute foundation of structural fire safety.
Understanding Basic Switch Wiring
The incoming line wire carries live, dangerous current directly from the main breaker panel. The outgoing load wire transports that same current up to the ceiling light fixture. Neutral conductors typically bypass the toggle entirely, completing the return loop back to the panel. Ground wires provide a critical, safe escape route for rogue electricity during a sudden short circuit.
Connecting Single-Pole Switches
Standard ON/OFF configurations rely on incredibly straightforward wiring principles. Electricians attach the incoming hot wire to one brass terminal and the outgoing leg to the other. The mechanical toggle simply bridges these two metal points internally to illuminate the room.
Connecting Three-Way and Double-Pole Switches
More advanced setups demand careful attention to specialized traveler wires and common terminals. Three-way designs utilize a dark common screw and two traveler terminals to pass current between multiple hallways. Double-pole variants control two separate hot legs simultaneously, breaking 240-volt circuits completely for maximum safety.
Common Wiring Mistakes to Avoid
Loose terminal screws rank as the leading cause of hidden electrical fires globally. Inserting conductors backward or placing them on the wrong screws ruins the circuit entirely. Skipping the bare grounding connection leaves users highly vulnerable to severe electrocution during a grid surge.
Common Problems After Changing an Electrical Switch
Even experienced technicians occasionally face minor issues after completing a new installation. Watch out for these specific post-installation warning signs:
Switch not functioning correctly: The toggle moves smoothly, but the attached light fixture remains completely dark.
Flickering lights: The bulbs dim or pulse rapidly due to a loose wire connection behind the plate.
Sparking or unusual heat: The plastic faceplate feels warm to the touch, indicating severe resistance or an internal short.
Circuit breaker tripping: The main panel immediately shuts off power right after you finish the installation and flip the toggle.
When to Replace an Electrical Switch
Hardware eventually degrades after thousands of cycles and years of constant mechanical toggling. Physical damage, such as a cracked plastic housing or a broken lever, requires immediate professional attention. Burn marks or severe discoloration around the faceplate suggest dangerous internal overheating has already occurred.
Loose or unreliable operation indicates the internal spring mechanism has failed completely. An audible crackling sound during operation means electricity is arcing across degraded internal copper contacts. Upgrading outdated, heavily worn designs protects the entire property from sudden, devastating electrical fires.
Best Practices for Electrical Switch Installation and Maintenance
Maintaining strict quality control during an installation extends the lifespan of the entire circuit.
Choosing the Correct Switch Rating
Voltage and current compatibility strictly dictate the safety of your entire electrical project. Never install hardware rated lower than the circuit breaker protecting that specific branch wire. A heavy 20-amp commercial circuit demands a robust 20-amp toggle to handle the load securely.
Following Electrical Standards and Codes
Local regulations exist entirely to prevent property damage and save vulnerable human lives. and IEC compliance guarantees that every physical connection meets rigorous safety thresholds. Pulling the required permits and passing municipal inspections officially validates your hard work.
Scheduling Periodic Inspection
Routine evaluations help technicians identify microscopic mechanical wear before a catastrophic failure occurs. Facility managers should check heavy-use toggles annually for mechanical stiffness or loose faceplates. Tightening terminal screws periodically prevents dangerous heat buildup caused by natural thermal expansion and contraction.
Real-World Applications of Electrical Switches
Different environments subject these vital control devices to vastly unique operational stresses.
Residential Electrical Systems
Homes rely heavily on standard toggles and modern dimmers for daily ambient lighting control. These domestic units prioritize high aesthetic appeal alongside basic, reliable appliance management. Smart devices increasingly dominate this sector, offering automated scheduling and remote smartphone access.
Commercial Buildings
Office complexes utilize highly durable hardware to endure constant daily use by hundreds of employees. Energy management systems integrate occupancy sensors to shut off lights in empty conference rooms automatically. This proactive switching technology significantly reduces overall corporate energy expenditures and lowers carbon footprints.
Industrial and Utility Applications
Manufacturing plants demand rugged, heavy-duty switching systems encased in waterproof or explosion-proof housings. These industrial variants control massive conveyor belts, heavy ventilation fans, and critical assembly line robotics. They withstand extreme machinery vibrations, harsh chemicals, and severe temperature fluctuations effortlessly.
Final Thoughts
Mastering how to change an electrical switch transforms a daunting chore into a highly rewarding maintenance task. Understanding how to connect electricity switch hardware safely prevents catastrophic fires and guarantees long-term system reliability. Diligent preparation, selecting the right tools, and strict adherence to protocol remain absolutely non-negotiable.
Always prioritize high-quality electrical components to protect your facility from unexpected mechanical failures. Upgrading outdated hardware modernizes your infrastructure while dramatically improving overall user safety. Oohmage proudly provides premium electrical switches, robust wiring accessories, and advanced protection products designed for secure, efficient installations worldwide.
FAQs
How do I safely change an electrical switch?
Begin by shutting off the main circuit breaker and verifying zero voltage with a non-contact tester. Remove the faceplate, pull the old unit out, and carefully disconnect the attached conductors. Connect the bare ground, attach the line and load wires tightly to the new unit, and restore power.
How to connect electricity switch wiring correctly?
Strip roughly half an inch of insulation off the copper conductors to ensure a clean contact point. Bend the bare wire into a hook shape and loop it clockwise around the terminal screw. Tighten the screw firmly so the metal bites down, and wrap the sides with electrical tape.
What tools are needed to replace an electrical switch?
You need Phillips and flathead screwdrivers to remove the mounting hardware and faceplates easily. Wire strippers and needle-nose pliers allow you to cut, strip, and shape the copper conductors perfectly. A reliable non-contact voltage tester remains the most critical tool for verifying a completely de-energized circuit.
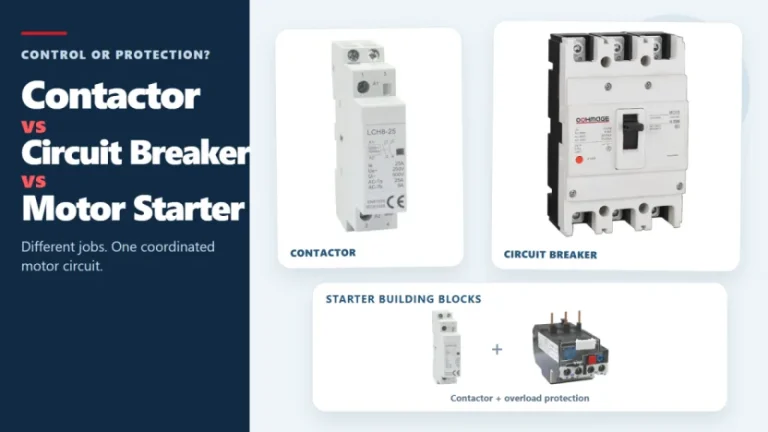
Figure 1. Contactors, circuit breakers, and motor starters solve different control and protection tasks. These three devices often appear in the same motor-control panel, but they solve different problems. A contactor handles frequent, remote, or automatic switching during normal operation. A circuit breaker interrupts abnormal current within its rated capability. A motor starter normally combines […]
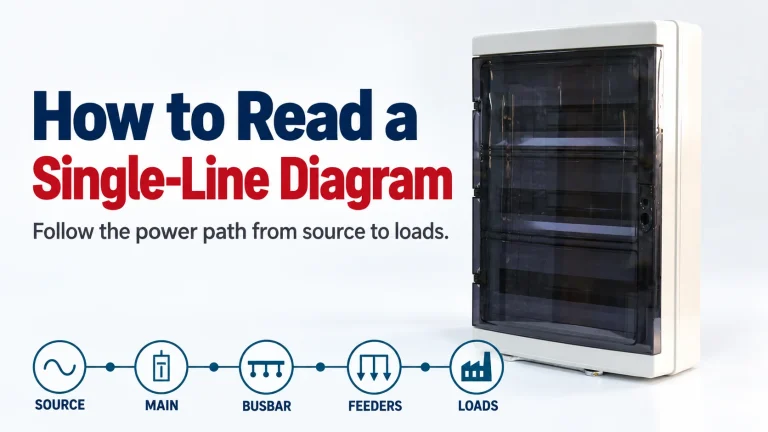
A single-line diagram can look simple and still be difficult to read. One line may represent a multiphase circuit, a small symbol may stand for a major protective device, and a short label may carry the information that determines what equipment belongs downstream. The most reliable way to read a single-line diagram is to follow […]
Figure 1. Three-phase SPD selection starts with system facts, not the largest kA number. A three-phase surge protector should not be selected by the largest kA number on its label. First confirm the system voltage, whether a neutral is present, the earthing arrangement, the installation point, and the required SPD type. Then compare Uc, Up, […]